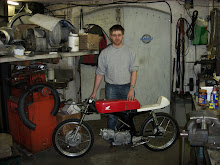
For the RSC90 I've made all the cables by altering original or aftermarket honda grey cables, like I've done for my other bikes. A while ago, someone asked me to write it all down and make somewhat of a manual for altering cables.
Well here is the method I use, from what I know, I think this is the best way to do it.
But, in this modern world of prosecuting people, I take no responsibility for the cables you alter, this is just a guideline.
I start with a Honda or aftermarket cable, I like grey, but this can also be done for black cables of course.
This example is of a front brake cable for a twin leading Honda front brake, normally I would shorten this from the top, but in this example I used a cable that was already cut at the bottom and added the original adjusters to it, that have been taken off old cables before they were thrown away.
You start with cutting the inner cable at the nipple that you want to replace.
Then you take out the inner cable, and cut the outer cable to length.
I use an angle grinder for all cutting, this leaves clean straight cuts, do not use wirecutters for the outer cable, the uneven end could screw itself into the inner cable, blocking the function. You need a flat end off the outer cable:
Now you replace the ferrules at the ends that have been cut off, in my case this is the big adjuster that goes onto the brakeplate. Sometimes it is possible to take off the old ones from the end that is cut off, but is is much easier to buy new ones. I get my supplies from the cable-shop.
Now you want to put everything onto the cable, it wouldn't be the first time someone has it all soldered only to find out he forgot the adjuster that has no slot to slide it onto the cable afterwards.
Now you unraffle the inner cable (the steel nipple on this cable is homemade to fit the twin leading hub, nipples for the top to fit into the levers are normally available) the nipple is also fitted, as it can be difficult to get it on after the cable has been rewinded.
The outer wires are oppositely wound to the inner wires.
Take the inner wires and unwind these also, this will have a straight wire in the middle, cut this down about 1cm.
After this, rewind the inner cables, and then the outer cables, when done correctly, this will leave you with a normal looking cable, but with a small hole on the end.
Sadly my camera couldn't really get this clear.
Now you take a piece of steel wire (not stainless) about 2mm diameter, and make a wedge out of it, I do this by rotating it against an anglegrinder with a sanding disc.
Cut it off, long enough so you can still handle it.
Then it is inserted into the hole on the end of the inner cable so that it is spread outwards and the nipple is pushed onto this.
You should be able to pull on the nipple without pulling it off the cable, even before the wedge is soldered into place. This way, the strength comes from the cable being wedged into the nipple instead of the solder, this will just keep the wedge from falling out.
The tools for the job:
Use the flux on the parts you want to solder, heat the nipple and cable and then apply the solder (tin/lead) from the bottom where the wedge sits. (use silver for stainless cables)
Stop when you see the solder creeping thru the cable at the top of the nipple.
At this point, let it cool gently, afterwards you can grind away the excess parts of the wedge and/or cable. Now you can mount your cable.
This method will work on clutch and throttle cables also, with throttle cables it isn't always necessary to take out the middle strand, as the strands are thinner and more flexible.
I wish you good luck altering your cables, and if you have questions, don't hesitate to ask.
Tuesday, July 20, 2010
Wednesday, July 14, 2010
stator replacement
The replacement for the 90 stator is ready, it has a mark to check the points and a bolt screwed in from the back, that holds the oil pump gear in place.
Too bad the aluminium turned out to be really soft, when I tightened the three bolts, the aluminium expanded, actually causing it to get pushed outwards against the casing.....
For now I'll let it be, and get on with building the rest of the engine, but I think this part will be replaced by something of better quality.
front brake
The CB72 is ready again for the event in Lelystad next weekend. I had some trouble with the front brake, Honda 200mm drums are too light, when really used, they grow so much from the heat that the spokes become loose. From one of my dad's other CB72 racers came a front wheel with Suzuki T500 front drum, now fitted with a honda brakeplate. These hubs have a thicker lining and can withstand the abuse of racing with modern tyres.
New silencer from Honda
I was just looking around the CMS website, when I came across this new model silencer from Honda.
I think its cool, I just don't have the "model" this plugs into.
they also have a red version.
I think its cool, I just don't have the "model" this plugs into.
they also have a red version.
Sunday, July 11, 2010
RSC rotor
On the 90 I will not be using the original rotor and stator assembly, to save weight on the cranck, and in total, I will be running a battery ignition that will be recharged before every event.
But to check the ignition timing and valves, I need something to determine "Top" and "Fire".
I bought a ct90 rotor from Loef that I modified.
All the weight has been taken off, leaving just the center with the cone and slot for the woodruff key. Onto this I bolted an alloy disc (bolts will be replaced by original honda cross-head bolts)
And then copied the markings from the original CS90 rotor onto the alloy disc.
This rotor will be permanently mounted to the cranck, as I don't want the hassle of putting it on every time I need to check something.
Next step will be an alloy ring to replace the stator, it will have the mark for timing and something to keep the oil-pump shaft in place.
Racing at Purmerend
Last week we had an event in Purmerend at a closed off industrial area. I raced my 50 and my dad's CB72 to compete in 2 classes. This was the third event I rode the 250 to see if I would like the "big" bike.
Action shots are thanks to Lea langezaal, the club photographer, see more of her pictures on the CRT website
The number 2 bike is an Aermacchi.
Unfortunately in the last heat, the motor shot out of gear, or so it seemed, I was quick with the clutch, had a look if I could see anything wrong, but nothing to see. I tried to release the clutch gently, but that didn't feel right, so I quit.
Back home, we took out the engine, my dad has three of these bikes, and raced them with friends. Back then, the bolt that alligns the shift fork with the shift drum had broken before, so that was believed to be the problem. But when we opened the clutch cover, the real problem became all to clear: broken primairy chain.
This is a "normal" thing to happen to a CB72, especially when raced, but usually the chain cracks the cluch cover making it clear what happend, in my case it didn't even leave a scratch on the inside.
Fortunately my dad had a new stronger chain set ready to fit to this engine, just didn't get round to fitting it yet.
Monday, July 5, 2010
progress on the 90
I've done some work on my RSC90 project as well, assembled all the clutch parts and fitted the cover, with breather unit.
Also fitted the bigbore piston and cilinder, although it has to come off again because I can't remember if I put the knock pin in. I hope I did because the pistonrings were a pain to get in, when the cilinder was bored out, the sloping edge has disappeared.
Chain tensioner has been put in after this picture was made, but I have to figure out a way to keep the oil-pump sprocket in place as I don't want to use the stator which normally keeps it from moving side to side.
pictures from down under
I recieved some more pictures from Stew's RSC90 project.
He found an original honda stand for only 10 dollars at a swap meat. Think it's from an MT125 or RS125 2stroke racer, but I'm not sure, my stands were homemade from pictures.
Note the details, MT125R top yoke, lightened rear sprocket and everything else.
He found an original honda stand for only 10 dollars at a swap meat. Think it's from an MT125 or RS125 2stroke racer, but I'm not sure, my stands were homemade from pictures.
Note the details, MT125R top yoke, lightened rear sprocket and everything else.
Subscribe to:
Posts (Atom)