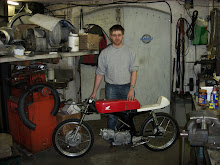
This weekend I was at my local honda shop, again... and picked up some original rockers and small parts in case mine couldn't be rescued anymore.
But after some grinding and machining, the old lightened ones are saved, let's just hope they don't break.
Compared to the originals you can clearly see the weightloss, about 5 grams per rocker.
And then of course I also had to lighten the rest of the parts for the real racing feeling. lightened the valves by about 2 grams and valve spring retainers also lost 2 grams each.
Installed in a nice clean head:
The cylinder it will go on, 45mm bigbore, I suspect it to be a modified CD125 piston in 4th oversize, I bought the kit as is.
Headgasket needed to be changed because of the bigger bore, so the inner diameter is a bit bigger then the one that was in the gasketkit, but also the thickness was increased to lower compression to about 10,3:1
With the bigbore kit, the original compression of 9,5:1 would have been raised to 11,5:1 when using an original headgasket, this is a bit much with modern 95 octane fuels at the pump.
This is the result of today, a finished engine, so far.
All bolts have been replced with original cross heads, and all parts I had are mounted. Still need some oilseals and a few bolts for the headcover to complete this, and would like an ignition with cover, but I could take that off my other engine for now.
The oil-line goes directly from the engine to the head, not through the carb, as I might mount a different style carb to this motor at some point.
Sunday, February 27, 2011
Wednesday, February 23, 2011
rocker trouble
I took the rockers out of their cover for the first time, as you can see from the picture, someone has done some work on them with a grinder, probably to lighten them.
But it doesn't look real professional, and when looking at the adjusternuts, you would really say it was a crappy job.
both nuts didn't fall flat to the rockers, but grind in the corner, exhaust being the worst:
So I will have some work to undo this, I will have to lighten the rockers some more, but in ways I am not so sure about, so I hope they will not break when I'm finished with them and doing 11.000RPM.
Sunday, February 20, 2011
more valve covers
Found these at my local honda shop this weekend:
To ad to my collection of valve covers:
If someone needs covers like the last ones in this picture, they still had a box full of them, on the bottom of that box I found these chromed covers and some strange red anodised alloy cap that I plan to modify with a small window, so I can see my lightened valve spring retainers rotating. Just for fun.
C110 engine build
The gasket set is in from the UK, thanks to ebay, so the engine could be put together again, and that is what I've been doing this weekend.
As said before, the 5speed gearbox wouldn't fit, so the original 4 speed has gone back in, it was in great shape, so no work needed there, only some new bearings. The same applied for the crankshaft, new bearings and a cleaning to get rid of the old castrol racing oil.
As this engine was used for racing, there was no kickstart shaft, I didn't find a complete new unit (yet), so I've decided to keep the racing pedigree alive and block off the hole with a nice alloy plug.
The alloy clutchplate had some bad grooves in it, so I replced it with a new one I had laying around, together with new steel and lined plates, this should work fine again.
Also mounted the breather unit to the clutch cover, together with the blocked kickstarthole, this gives a nice racing-look.
After this I mounted the 45mm cylinder and piston, so I'm ready for some head-work.
To complete this motor I will need to find some more parts, because I'd rather not cannibalize the running C110 engine that is now under the bike. Enyone who can help me with a clutch adjuster cover, ignition and ignition cover? And if possible an intake manifold and carburetor?
Although I'm thinking of putting on a bigger carb, should be 1960's kei-hin, with a racing look, something like a CB160 powerjet carb, if I can find it.
And don't mind the allenbolts, they will be replaced with original crossheads, will be ordered together with oilseals and some other parts still needed.
Monday, February 14, 2011
Beemer out of the corner
the weather is getting better, and sometimes I really feel like riding, but the beemer needs work, so "let's get to it" I thought.
I cut some material from the rear fender, looks a lot sportier then the original.
And hung the fairing on the bike, to get an idea of what it should look like.
Will need stiffer front fork springs before I can fit the fairing, or it will hit the front fender when I mount it where I want it to be.
I cut some material from the rear fender, looks a lot sportier then the original.
And hung the fairing on the bike, to get an idea of what it should look like.
Will need stiffer front fork springs before I can fit the fairing, or it will hit the front fender when I mount it where I want it to be.
breather
The S90 has a nice breather with labirynth dipstick, but the rules say I also have to have a bottle to catch any oil coming out, if anything were to go wrong.
I couldn't decide what to do, it should look a bit retro, maybe an old oilcan, but what I found was too big. This is a small bike, it should have a small bottle that does not interfear too much with the lines of the bike.
When holding some bottle's upto the bike, this is what I came up with:
Generic plastic bottle hold by a honda inletrubber-clamp off a cb450, resting on the brakelightswitchmount (anyone for scrable?)
Also the electrics are finished,
might be running them inside the frame, but for now this works, I've seen less pretty solutions on original old RSC pictures.
It is a racebike, it should be functional, this can mean it will be a bit raw, but I like that on old racebikes.
I'd rather see a bike, fresh from the track with ducktape and lockwire repaires then an over-restored one.
This is how my bike looks now, just need to make a tank.... like it's nothing.
Then fit the seat and a fairing.
Or number plates, as it would be a shame to hide the mechanics.
Tuesday, February 8, 2011
electrics
To get the 90 running, at least for a testride to see if the engine works, I need to do the electrics of the bike.
Not really much to do, but I want to do it right, so it will be easy to work on in the future, if I have to take out the engine, or remove the rev-counter.
As I will be running a battery-ignition system, I need an on/off switch. I was thinking of a toggle-switch, but I couldn't find one, but I did find an old SS50 ignitionswitch, so I decided to make a bracket for that, so it could be mounted somewhere in sight and accessible when sitting on the bike.
So the original S90 igniotionswitch-hole was not an option, I want to see if I have the ignition on when I am waiting on the startline for the flag to drop.
Once I pushed the CB72 for about 20 meters before I remembered the ignition.......
This is what I came up with for the RSC90:
The key will be secured with safety-wire so nobody steals it in the paddock, and also to prevent it from falling out, as this was a very old switch, the key can be taken out even when it is turned on...oops
The reason why I replaced it on my SS50.
Sunday, February 6, 2011
90 swingarm
With the CB50 racer I experienced an enormous change in handling when the swingarm was converted to needlebearings, so naturally this was also planned for the 90.
Honda uses rubber silentblocks in their swingarms which will flex when you turn into a corner.
These silentblocks have abnormal sizes when compared to standard bearings, this is why a bush was made to fit around the 24mm bearing and into the 25mm swingarm.
This will be pressed into he swingarm and blocked off using our "patented" maintenance free method.
Friday, February 4, 2011
90's of australia
As seen before on my blog, Stew Ross has an S90 he is converting into an RSC. He sent me pictures regularly and we exchange ideas about our builds.
Here is one of the most recent pictures of his bike.
Keihin CR26 carb added and note the MT125R top crown plate with the racing brake and clutch levers.
Rencently I recieved some pictures from Mark Knowles, also from australia, and also building an S90 racebike. He has his engine all finished, bored and stroked to 124cc (54x54) with lightened cranck, clutch, rockers, valves, well almost everything actually.
I hope to see the progress as these bikes are being completed.
Tuesday, February 1, 2011
90 engine finished
My 90 engine is finally finished.
Last week I recieved the titanium valve spring retainers for my 90 motor so it was time to mount them and finish the cylinderhead.
Back when I compared SS50 valvesprings with S90 springs, I must have made a mistake somewhere, as the inner diameter of the outer springs differs.
This meant that the springs had to be "helped" a little bit to fit the retainers, but that all worked out.
Fitted together with PM/rocky valve spring set to cope with the high lift camshaft of unknown origin. As original springs would bottom out at this high lift and wouldn't give enough pressure for a high revving engine with this cam.
Further modifications of my engine include:
Lightened valves and rockers.
High lift camshaft.
Ported head with matching intake manifold.
Kei-hin CR29 carb. (the real old model)
53mm piston kit in alloy cylinder.
No rotor on cranckshaft anymore.
Close ratio 4th gear
all combined to form this picture:
Subscribe to:
Posts (Atom)